Technical hurdles
When I started working on the code for the camera, I was genuinely surprised at the lack of easy tutorials to get the software up and running. The only truly straightforward and easy part was installing the operating system onto the Raspberry Pi. After that, you’re in your own world. I would try software only to have it do about half of what I needed it to do; the best parts were when there was a blog post that looked like a promising step in the right direction, only to not be able to get the files that were necessary to take that step. While i ended up getting the webcam to record just fine using FFMPEG, writing a python script and having it load on startup was a nightmare that has not ended yet. Also, with FFMPEG, you have to press ‘q’ in order to stop the recording, but there is no software that can create a virtual keystroke of the letter ‘q’ for the program to recognize. This relegated us to a demo that in real life would be a one hit wonder until someone recovered the camera, plugged in a keyboard, and hit ‘q’ to stop the recording. That is not a friendly user experience.
The two hurdles remaining are simulating that keystroke and changing the python script to run on startup. The second part I know how to do, but I do not want to test it since I would get up to the start of recording and then have to cut power to the Raspberry Pi in order to stop the recording. The last thing that would have to work is that the simulation of the keystroke would have to register when a user is not logged in.
You’re Always Being Watched!

Did you realize that nearly every place you go to you’re being watched by cameras? How can your DIY camera change that? Depending on how you choose to use it, hopefully it’s for good. Our DIY camera is extremely affordable and allows almost anyone to own one or make one. Can you imagine how people’s behavior would be altered if they were even on camera in private places?
The government supposedly has the right to put us on camera constantly and giving back the power to the average citizen would equal out the power. With an inexpensive alternative like our DIY camera, it puts a nice security camera in the hands of many people. So how would this even out the power between us and the people watching us? It simply gives us the same power that they have, a security camera! We’re now able to place these cameras anywhere because they are small and inexpensive to make and easy to hide. Please don’t put it anywhere that will get you in trouble, but it really opens up possibilities to secure our our houses and land that we own.
Our DIY camera is meant for good. It’s like gun control. I’m not going to break into a house when I know the owner might have a gun. I’m not going to break into a house if the owner has their own DIY security camera!
Get out and dabble with our DIY camera and let’s make it mainstream. We can’t always rely on the government to protect us and this is a good way to secure your own stuff inexpensively. God bless you and God bless America!
Surveillance: Is it about technology or society?

Surveillance has become a systematic focus on our everyday lives. Is it the technology available to us that is shaping our thoughts or the fact that as a society we have become so paranoid that we feel we need to be watching over one another? Well, it’s actually a little bit of both.
Technological determinism is the theory that technology progresses at a steady pace while we as a society follow along and adopt the advancements given to us. Cultural determinism is the theory that the culture in which we are raised determines what technological advancements will be created. Both of these theories coincide to develop the kind of world which we live in. Most technological advancements have been created with a specific social purpose in mind (technological determinism), but it is within the culture that we are raised which determines the social purpose (cultural determinism).
History progresses by changing the subject rather than by progressing from one event or stage to the next. Crime, theft , and deception have been around since the beginning of human kind. The fact that people have decided that this type of activity is immoral and offensive is created by the people and produces the values which they want to live off of. How people handle this issue has changed as various ways of surveillance have been created. Inventions such as weapons and traps have been used to alleviate the chance of risk and security, but were not originally created or used for this exact purpose. The fact that these features have been developed and redeveloped shows that cultural desire and advancements in technology work side by side.
As a culture, we have decided that we want extra security. Technology has progressed to allow people to be recorded. Together, these ideas have formed and evolved into surveillance systems. Being able to create your own DIY surveillance camera uses easily available technological equipment to manufacture and customize a system to benefit your own needs.
It’s About Coming Together

Paulina Borsook who wrote How Anarchy Works: On location with the masters of the metaverse, the Internet Engineering Task Force, brings up the fact that the internet has evolved from a small group of elite geeks to a massive group of more average folks. This change necessitates a steady growth in awareness and involvement. What has brought on this growth in internet engineering knowledge? Peer-to-peer collaboration.
When materials, tools, and information are readily available, more people can participate and engage in an activity. Now that people are collectively sharing information online, more people can see how internet DIY is done.
Internet DIY is also known as hacking. Hacking stereotypically has a negative connotation behind it, but it should be thought of as someone taking something and turning it into something new. Pnina Shachaf and Noriko Hara reference some interesting studies on hacking in Beyond Vandalism: Wikipedia Trolls. They discuss a study which introduces categories of hackers, one being hacktivism for political messages and social justice. Another study identified hackers’ accounts through interviews and reported that the accounts included motivations such as: fun and exciting activities, personal curiosity, display of computer talent, and ease of execution.
While we have steadily been progressing into an age where anyone can be a hacker, there is still limited resources for the average folk. A lot of websites that include hacker information and tutorials are written for someone who has experience in that field and knows the ins, outs, definitions, and overall hacker language.
That is why we decided to create this DIY surveillance camera. You don’t need to be an experienced hacker or “elite geek” to create this camera hack. We used visuals and language that the average internet user can understand, because that is what we were before beginning this process. We “decoded” what other tutorials and websites had to say on the subject and reworded so that anyone could understand. It’s about collaboration and growth, which is what the internet was originally intended for.

Things Aren’t Always What They Seem…

Yesterday when we were working as a group on our project we learned this very important lesson, that things aren’t always what they seem… We were trying to download an .img file onto an SD card so that the Raspberry Pi would behave properly and perform the tasks that we have chosen for it to carry out. Little did we know that an .img file is not always a picture file. This .img file we could not even open to view on our computer. Through our experience with this .img file we learned that things are not always what they seem…
DIY Surveillance Camera – Items Needed
Here is a visual list of the materials you will need in order to build your very own DIY Surveillance Camera.

Raspberry Pi

4GB + Class 4 or above SD card (name brand, not generic)

Arduino (with USB cable connector)

![Female USB to AC power supply (output 5V, 1A) [iPhone power supply works best]](https://arduinofinalproject2012.wordpress.com/wp-content/uploads/2012/12/female-usb-to-power-supply.jpg?w=300&h=246)
Female USB to AC power supply (output 5V, 1A) [iPhone power supply works best]

Internet access

USB wired mouse (optional)

USB wired keyboard

USB hub

Ethernet cable

Monitor

HDMI cable

Male micro-USB to male USB cord
DIY Surveillance Camera Step 2: Plugging in your devices
DIY Surveillance Camera
Step 2: Plugging in your devices

Place your SD card into your Raspberry Pi
Plug your male micro-USB into a USB port onto your Raspberry Pi
Plug the male USB (from the male micro-USB) into the AC to USB-female power supply
Plug the AC to USB power supply into an outlet
Plug your keyboard into a USB port on your Raspberry Pi
Plug your USB hub into a USB port on your Raspberry Pi via the USB uplink cable
Plug the power cord and supply into a wall outlet
Plug one end of your ethernet cable into your computer
Plug the other end of your ethernet cable into your Raspberry Pi
Plug your webcam into your USB hub
Plug one end of the HDMI cable into the Raspberry Pi
Plug the other end of the HDMI cable into the monitor (you may need to use a converter if the monitor has a DVI port)
DIY Surveillance Camera Mac OS X Step 1: Image to SD card
DIY Surveillance Camera Mac OS X
Step 1: Image to SD card
The first step you will need to take is to get the reference root filesystem (aka “image”) onto your SD card.
1. Raspbian Wheezy is the best image to upload to your SD card. It’s a good starter operating system and it’s free.
Download the “image” here:
http://www.raspberrypi.org/downloads
If you have a torrent client (such as utorrent), the torrent method is the quickest. If not, you can do the direct download. Plan ahead! This can take several hours to download!
2. Once download is complete, move the wheezyraspbian.img file to your desktop.
3. Plug your SD card into your card reader and plug your card reader into your computer.
4. From the Apple menu, choose About This Mac, then click on More info…; if you are using Mac OS X 10.8.x Mountain Lion then click on System report.
5. Click on USB (or Card Reader if using an in-built SD card reader) then search for your SD card in the upper right section of the window; click it, then search for BSD namein the lower right section: must be something like diskn where n is a number (for example, disk4).
6. Note this number.
7. Open your terminal (Go-Utilities-Terminal).
8. Make sure you are in the desktop directory by typing “cd desktop” and hit enter.

9. To confirm you are on the desktop directory and see the wheezyraspbian.img type “ls” and hit enter.

10. Type the following code into your terminal and hit enter. **Remember to replace n with the number that you noted (step 6)**
sudo dd if=path_of_your_image.img of=/dev/diskn bs=1m

11. Wait for “image” to transfer.
Once complete, you can eject your card reader and remove the SD card. Insert it into your Raspberry Pi and proceed to the next step – Plugging in your devices.
")
Turning the average user into a DIYer! :)
Our hacking group has gotten together and we have been working through the different steps in our Do It Yourself Security Camera. We have come across many different difficulties and we are going to try to make those more simple for the average person who wants to be a hacker or DIYer. Our main struggle for today’s project was getting the operating system onto the SD card which would allow us to hook up the security camera to a small computer called a Raspberry Pi and we could record video and take photos.
There are different steps we must take to complete the security camera and in our next post we are going to start off with a few complex steps that have been simplified down to where the average person can complete with ease. We don’t want to make things a struggle for you to make this DIY camera because we have already been through that and we want to guide you through the main steps without all the extra fluff.
The directions we were following were for people that have done a fair amount of hacking before. We want to provide the every day regular email checker and internet surfer a good walk through of how to make an awesome security camera without getting too frustrated like we did. We spent a few hours trying out different ways to download and install different things like the operating system and discussing the steps of making the security camera and our goal is to make them simple enough so you don’t have to do any of that mess.
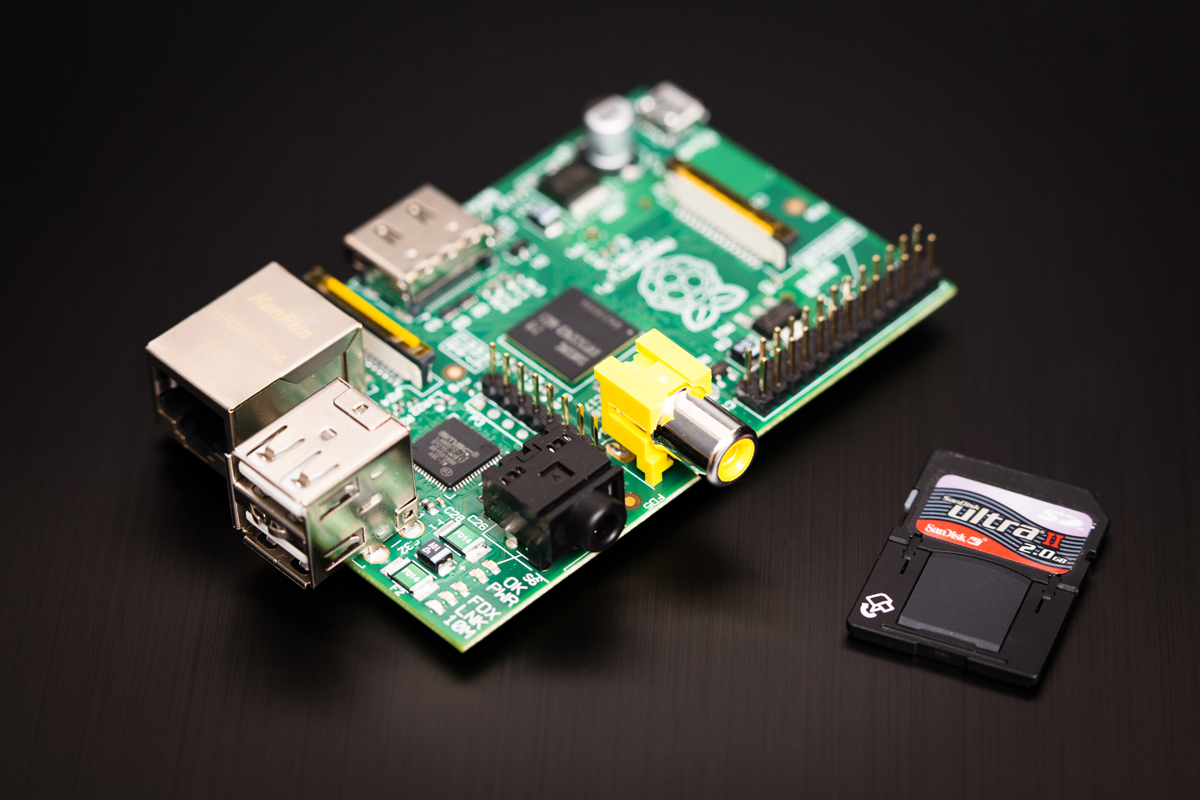
Raspberry Pi and SD Card

Watching The Government Watch Us
In order to build our camera, we are all helping out by working on different parts of it and coming together to talk about it. It’s all been a good experience to work together and to problem solve. There is coding involved along with multiple items we need for it to all come together. We are working on making it a fairly simple Do It Yourself security camera for YOU.

Security
We are constantly being watched by security cameras and we wanted to even out the playing field. People act differently when they are know they are being watched. That can be good and that can be bad and this is our experiment to test this.
Thanks for reading!
